Importing Field Data
Search
Forms and Fields Available to the Import Process
Whether you are importing data to fields on a standard system form type or custom fields on a custom form you created, the import process is the same. The following form types and field types are available for importing.
Form Types - While these form types are included in the import process, only the field types noted below are available for any form type.
- Custom Forms
- Contracts, Contract Exhibits
- Directives
- Drawings, Drawing Packages
- Emails
- Field Reports
- Punch List Items
- Requests for Information
- Specifications, Specification Packages
- Submittals Items, Submittal Packages
Field Types
- Account Codes - The account code used in the import process must match the account code that has been previously setup in the Project Administration area. This includes the number of segments, character count, and all delimiters used in the account code (e.g. 11.22-333). Alpha and numeric characters can be used and the import is case insensitive.
- Checkbox- These options are representations of checked/unchecked and are case insensitive - True, False / Yes, No / 1, 0 / On, Off.
- Currency - Can import both positive and negative numbers. Symbols and alpha characters are not allowed. Decimal places are not required but if used, must be in 2 places. Proper importing examples are as follows noting the maximum values importable. $ can be used but for the import process, it is removed. Therefore it is not necessary to include a $ in the import template.
- ($2,147,483,648.00)
-$2,147,483,648.00
(2,147,483,648)
-2,147,483,648.00
- ($2,147,483,648.00)
- Date - Must be in the format of DD/MM/YYYY
- Email - Must contain the @ symbol
- Multi-line Text - Alpha, numeric, or special characters allowed up to 2500 total characters.
- Single Line Text - Alpha, numeric, or special characters allowed up to 255 total characters.
- Number - Numbers only. Range is -2147483648 to 2147483647.
- Phone Number - Alpha, numeric, or special characters allowed up to 255 total characters.
- Picklist (Standard Picklist and Project Picklist) - Must match pre-existing picklist options defined in the project. Picklist imports are case insensitive.
- Project Directory (Companies and Contacts) - Alpha characters up to 255. Although company and contact fields pull from the Project Directory, import is straight imported text.
- URL - Must contain protocols http or https, followed by ://
The Import Process
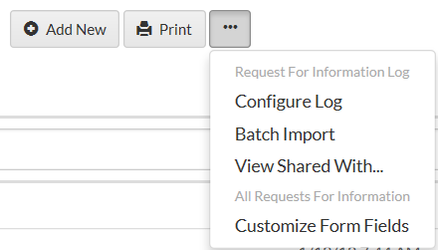
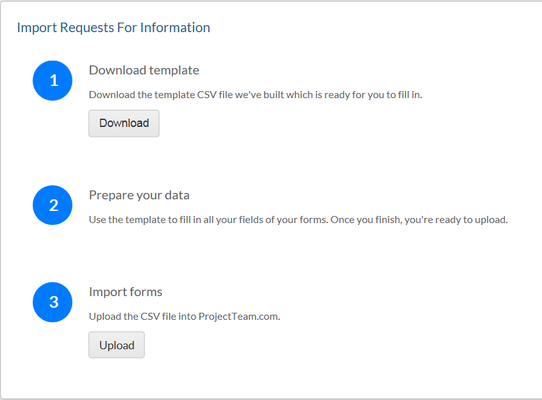
From the log view, click '...Batch Export'. The Batch Import wizard provides three easy steps to follow.
- Download template - Download the template CSV file we've built which is ready for you to fill in. Click the 'Download' button to download the template.
- Downloading a template will provide you with the columns necessary to input data.
- The order of the fields should match the same order as shown on the form. This order of fields must be maintained for the import process to succeed. If fields are added, renamed, or reordered, a new template must be downloaded.
- Only fields to which you have access will be downloaded.
- Prepare your data -Use the template to fill in all your fields of your forms. Once you finish, you're ready to upload.
- Required Fields - Although all exportable fields are downloaded to the template, only required fields need to be completed in order for the import to succeed. All other fields can be blank but must be present during the import.
- Follow the standard field rules for importing based on that field type as noted above.
- The number of columns must match the number of field on the form.
- Column headers must match the field label on the form
- Import forms - Upload the CSV file into ProjectTeam.com.
- When you have completed data entry and saved your template, click the 'Upload' button. Browse to and select your template. The import process will begin. If the import is successful and no errors are found, a summary confirmation screen will appear advising you of the # of rows imported. The import summary page provides a link to the form. Click this link to go to the log showing all imported documents.
- Erroneous entries - It is important to make sure the CSV file has valid entries prior to the import. If errors are found during the import, the import summary page will define those errors that need to be corrected in order for the import to be successful. Assuming there are no blank rows in the CSV file, the Row #, Field Name, Field Type, Value, and Error Description will be displayed.
- NOTE - If any one row is erroneous, no rows will be imported. This is by design to avoid duplicate documents being created from the import process. If for example you import 100 rows and 99 were validated and imported, fixing the one erroneous entry with a reimport of all 100 rows, will import all 100 rows again, leaving you with 99 duplicate entries. Therefore this rule is in place to protect against import duplication.
- The following are errors you might encounter during an import
Helpful Screenshots
, multiple selections available,