Running and Viewing Reports
Search
Running Reports
Before running reports, consider how you wish the detail of the report to be viewed. System Reports have been created to be displayed in following views. Select the appropriate report type and run the report.
- Log View - Log View provides a list type view for an up close view of all documents
- Detail View - A Detailed View provides a way to display data one-per-page. Rather than a log or list type view, each document is displayed on its own page in detail.
- Dashboard View - Get a graphical view via Pie, Bar, and Graph charts that present a visual of your data
After determining the best report type, run the system report in any of the following ways
- Double Click - Select the report as shown in the screen shot below and then double click
- Run Button - Select the report and then click the Run button in the upper left corner of the report
- Right Click - Right click on a selected report and choose 'Run Report' (This option will be available in a future release)
Viewing Reports
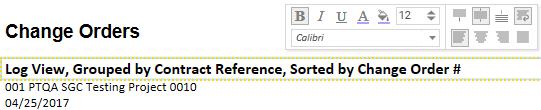
By default, the canned system reports are viewed by their designed layout and formatting, sorted and filtered as they were written. Displayed data however, can be manipulated to be displayed in a fashion more suitable to your viewing. In this example, we right click on the Report Name and we are prompted with a formatting dialog to select different options for display. Notice how we selected to Bold the Report Name and increase the font size from 10 to 12. Additionally, when a report is exported and printed, the report formatting is exported and printed in the same manner in which it was formatted it in view mode.
Before

After
The above screen shots 'Formatting Dialog' box provides the following options for viewing reports with modified formatting. Right click on the desired field choosing any of the following formatting options. To clear formatting, click the button in the upper left corner as shown in the screen shot below. Select '
 '. Note that applied styles are not saved and are lost when system reports are closed.
- Bold - Bolds the selected text in the selected field
- Italics - Italicizes the text in the selected field
- Underline - Underlines the text in the selected field
- Font Color - Changes the selected text to the desired font color
- Paint - Shades the parameters of the field to the desired background color
- Font Size - Increases/Decreases the text in the selected field to the desired font size
- Font Type - Changes the text in the selected field to the desired font type
- Alignment Options
 Top - Align cell contents to the top of the cell
 Middle - Align cell contents to the middle of the cell
 Bottom - Align cell contents to the bottom of the cell
 Left - Align cell contents to the left of the cell
 Center - Align cell contents to the center of the cell
 Right - Align cell contents to the right of the cell
 Justify - Justify cell contents to fit the cell's width
Helpful Screenshots
