Project Calendar
- Steve VanDyke
Search
Accessing the Project Calendar
To access the Project Calendar log into the project and on the Project Home Page, click the 'Project Calendar' button in the upper right corner of the Secondary Navigation Bar. The Project Calendar is displayed in 'Month' view by default.
Creating a Calendar Event
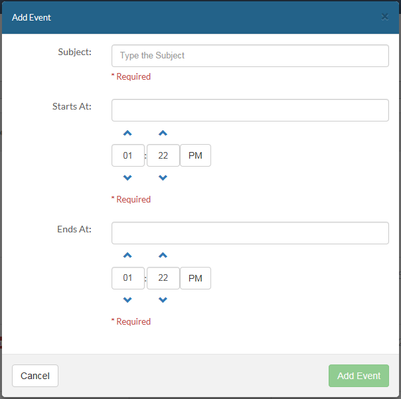
Any user on the project can create Calendar Events. To create a Calendar Event, click the 'Add New' button in the upper right corner of the Project Calendar and enter the following detail. Click 'Add Event' when finished.
- Subject - The subject is a required field and must be entered in order to save the event
- Starts At Date- Place your cursor in the 'Starts At' field and select the date for the start of the event. Starts At is a required field
- Starts At Time - From the Starts At Time selection, set the Starts At event time
- Ends At Date- Place your cursor in the 'Ends At' field and select the date for the end of the event. Ends At is a required field.
- Ends At Time - From the Ends At Time selection, set the Ends At event time.
- NOTE: The Starts At Date/Time must be set to a Date/Time prior to the Ends At Date/Time
Viewing Calendar Events
Calendar events can be viewed by Year, Month, Week, or Day. Click on the relevant tab to display the Calendar in that view. Existing events are displayed as an event icon (Red Circle with the # of events) - 
- Year - Displays the Calendar Year broken down by a annual chart. Existing events will be displayed as an icon in that month. To view the events, click the month on the chart that contains the event icon. The quarterly section will present a drop down section displaying all events
- Month - Displays the Calendar Month broken down by a monthly chart. To view events in the current month, click the day of the month that contains the event. The events will be displayed under the weekly section for that day
- Week - Displays the current Calendar Week. Events are displayed for the current week.
- Day - Displays the current Calendar Day. Events are displays for the current day.
- Navigation - Navigate through the calendar using the navigation arrows on the top of the calendar to move from year-to-year, month-to-month, week-to-week, day-to-day.
Editing Calendar Events
To edit a Calendar Event, navigate to that event. With the event exposed, click the edit icon 'Pencil'. Make the necessary edits and click 'Edit Event' when finished.
Deleting Calendar Events
To delete a Calendar Event, navigate to that event. With the event exposed, click the delete icon 'Trash Can'. In the confirmation screen, click 'Cancel' to cancel the deletion or click 'Yes' to delete the event.
Calendar Configurations
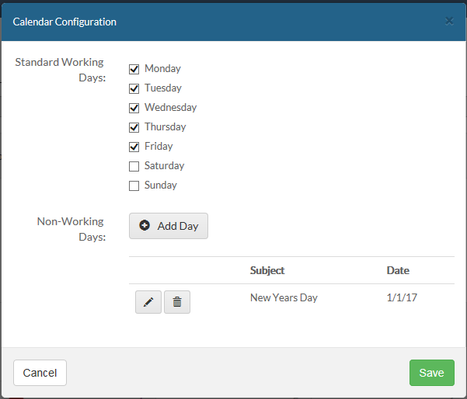
The Project Calendar can be configured to specify Standard Working Days vs. Non-Standard Working Days. It can also be configured to identify Non Working Days such as holidays. Configuring the Project Calendar can be useful as it applies to other areas of the application such as Workflow. A workflow step's 'Due Date' is configured based on the Project Calendar's 'Working Days'. To configure the Project Calendar, click the 'Cog' icon next to Project Calendar.
- Standard Working Days - Check the box next to the day that will be identified as a Standard Working Day (e.g. Monday - Friday)
- Non-Standard Working Days - Check the box next to the day that will be identified as a Non-Standard Working Day (e.g. Saturday & Sunday)
- Non-Working Days - Click the 'Add Day' button. Enter the Subject (e.g. New Years Day) and enter the Date. Click the 'Add Day' button to add the entry. Add as many entries as necessary and when ready, click the 'Save' button to save the Non-Working Day entries.
Helpful Screenshots